页面
在本章中,您将学习如何声明静态页面。
默认页面
在 Odoo 中,网站默认包含一些静态页面(首页、联系我们、404 错误页面等)。它们的构建方式如下。
<template id="website.homepage" name="Homepage">
    <t t-call="website.layout">

        <!-- Variables -->
        <t t-set="additional_title" t-value="'Home'" />

        <div id="wrap" class="oe_structure oe_empty">

            <!-- Content -->

        </div>

    </t>
</template>
定义元数据标题。
<t t-set="additional_title" t-value="'...'"/>
定义元描述。
<t t-set="meta_description" t-value="'...'"/>
为页面添加一个 CSS 类。
<t t-set="pageName" t-value="'...'"/>
隐藏页眉。
<t t-set="no_header" t-value="true"/>
隐藏页脚。
<t t-set="no_footer" t-value="true"/>
如需使用,可停用默认页面。
/website_airproof/data/pages/home.xml¶<record id="website.homepage" model="ir.ui.view">
<field name="active" eval="False"/>
</record>
/website_airproof/data/pages/contactus.xml¶<record id="website.contactus" model="ir.ui.view">
<field name="active" eval="False"/>
</record>
或者,使用 XPath 替换这些页面的默认内容。
/website_airproof/data/pages/404.xml¶<template id="404" inherit_id="http_routing.404">
<xpath expr="//*[@id='wrap']" position="replace">
<t t-set="additional_title" t-value="'404 - Not found'"/>
<div id="wrap" class="oe_structure">
<!-- Content -->
</div>
</xpath>
</template>
主题页面
你可以根据需要向网站中添加任意数量的页面。与其定义一个 <template>,不如创建一个页面对象。
声明
/website_airproof/data/pages/about_us.xml¶<record id="page_about_us" model="website.page">
<field name="name">About us</field>
<field name="is_published" eval="True"/>
<field name="key">website_airproof.page_about_us</field>
<field name="url">/about-us</field>
<field name="type">qweb</field>
<field name="arch" type="xml">
<t t-name="website_airproof.page_about_us">
<t t-call="website.layout">
<div id="wrap" class="oe_structure">
<!-- Content -->
</div>
</t>
</t>
</field>
</record>
字段 |
描述 |
|---|---|
名称 |
页面名称。 |
已发布 |
定义页面是否已发布(对访客可见)。 |
key |
视图键(必须唯一) |
网址 |
该页面可访问的网址。 |
类型 |
视图类型 |
arch |
视图架构 |
使用 <t t-call="website.layout"> 你可以使用 Odoo 默认的页面布局来编写你的代码。
页眉叠加层
将页眉背景设为透明,并使其位于页面内容之上。
<field name="header_overlay" eval="True"/>

媒体
图片
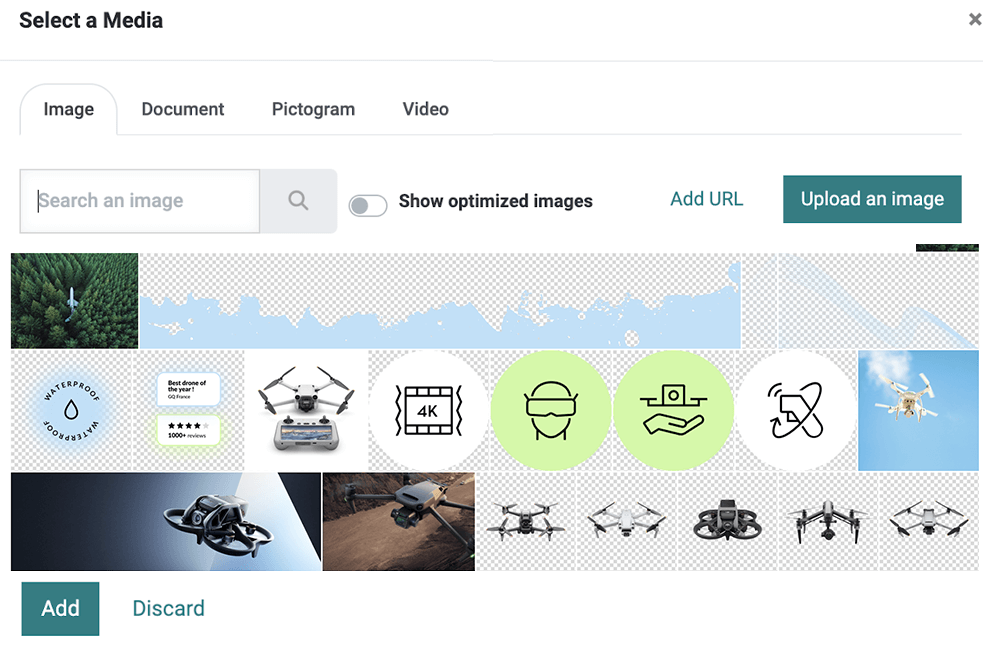
你可以将图片存储在数据库中,并在之后的设计/代码中使用它们。这些图片也将通过 媒体对话框 对最终用户可用。

网站构建器支持以下图片文件格式:JPG、GIF、PNG 和 SVG。
声明
/website_airproof/data/images.xml¶<record id="img_about_01" model="ir.attachment">
<field name="name">About Image 01</field>
<field name="datas" type="base64" file="website_airproof/static/src/img/content/img_about_01.jpg"/>
<field name="res_model">ir.ui.view</field>
<field name="public" eval="True"/>
</record>
字段 |
描述 |
|---|---|
名称 |
图片名称 |
数据 |
图片文件路径 |
res_model |
向导模型名称 |
用作背景图片。
<section style="background-image: url('/web/image/website_airproof.img_about_01');">
作为常规图片使用。
<img src="/web/image/website_airproof.img_about_01" alt=""/>
作为带有颜色筛选器的普通图片使用。
<img src="/web/image/website.s_media_list_default_image_1"
    class="img img-fluid mx-auto" alt=""
    data-gl-filter="custom"
    data-filter-options="{'filterColor': 'rgba(0, 0, 0, 0.5)'}"/>
小技巧
图片大小对用户体验、搜索引擎优化和网站整体性能有重大影响。因此,请确保正确调整图片尺寸。
视频
作为背景添加视频。
<section class="o_background_video" data-bg-video-src="...">
    <!-- Content -->
</section>
属性 |
描述 |
|---|---|
data-bg-video-src |
视频网址。 |
将视频作为内容添加。
<div class="media_iframe_video" data-oe-expression="...">
<div class="css_editable_mode_display"> </div>
<div class="media_iframe_video_size" contenteditable="false"> </div>
<iframe src="..."
frameborder="0"
contenteditable="false"
allowfullscreen="allowfullscreen"/>
</div>
属性 |
描述 |
|---|---|
data-oe-expression |
视频网址。 |
src |
视频网址。 |
图标
默认情况下,Font Awesome 图标库已包含在网站构建器中。您可以使用 CSS 前缀 fa 和图标的名称在任何位置放置图标。Font Awesome 专为与内联元素一起使用而设计。您可以使用 <i> 标签以简化代码,但使用 <span> 更符合语义规范。
<span class="fa fa-picture-o"/>
启用网站构建器的样式选项。
<span class="fa fa-2x fa-picture-o rounded-circle"/>
增大图标尺寸(使用 fa-2x、fa-3x、fa-4x 或 fa-5x 类)。
<span class="fa fa-2x fa-picture-o"/>