帖子页面
要查看帖子的完整概述,请转到 Odoo
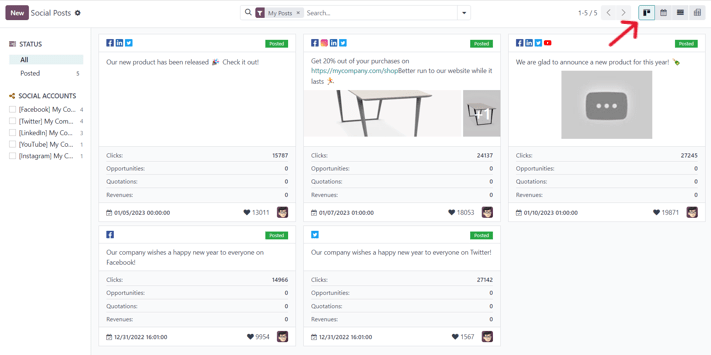
,然后在标题菜单中点击 。在这里,可以找到使用 Odoo 创建和发布的每个帖子。There are four different view options for the Social Posts page data: kanban, calendar, list, and pivot.
访客数据也可以以列表或图形的形式查看。这些视图选项位于 访客 页面右上角的搜索栏下方。
By default, Odoo displays the posts in a kanban view. The information on this page can be sorted even further, via the left sidebar, where all connected social accounts and posts can be quickly seen, accessed, and analyzed.
The kanban view is represented by an inverted bar graph icon in the upper-right corner.
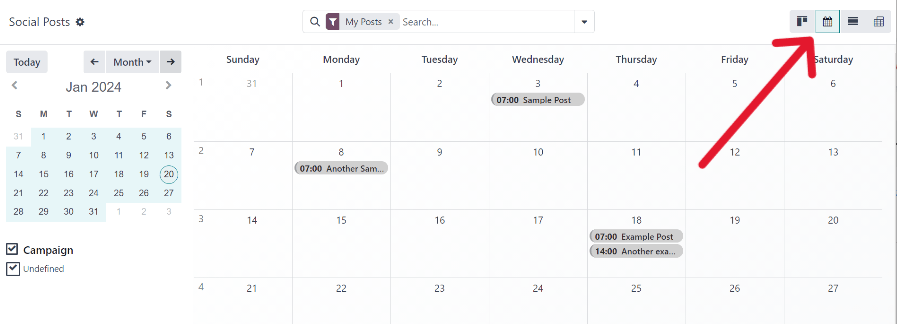
日历视图选项以日历格式显示发布的帖子或计划发布的帖子的可视化表示。此选项提供了对任何计划的日期、周或月的清晰概览,并且Odoo会显示所有草稿、计划和已发布的帖子。
Clicking on a date reveals a blank social media post detail form, in which a social media post can be created, and Odoo will post it on that specific date/time.
The calendar view is represented by a calendar icon in the upper-right corner.
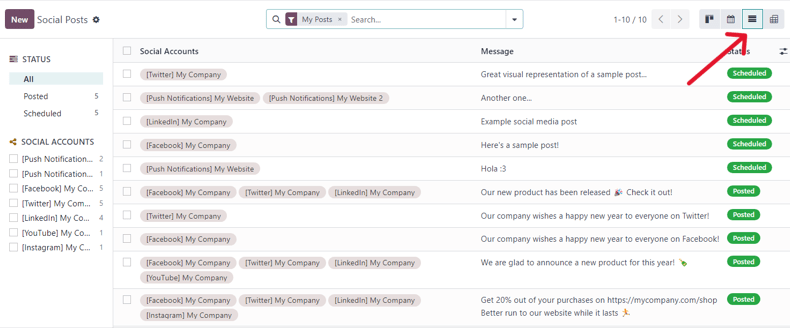
The list view option is similar to the kanban option, but instead of individual blocks, all post information is displayed in a clear, list layout. Each line of the list displays the Social Accounts, Message, and Status of every post.
There is also a helpful left sidebar that organizes all posts by Status and lists all connected Social Accounts, as well.
The list view is represented by four vertical lines in the upper-right corner.
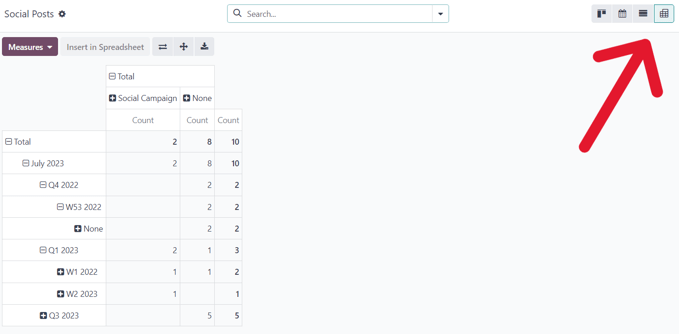
透视视图选项提供了一个完全可定制的网格表格,可以添加和分析不同的数据指标。
透视图选项提供了众多的分析选项,允许对各种帖子进行深入、详细的分析。
点击透视表中任意行旁边的 + (加号) 图标,以显示更多要添加到网格中的度量选项。
While in the pivot view, the option to Insert in Spreadsheet is available, located to the right of the Measures drop-down menu, in the upper-left corner of the Social Posts page.
在 插入到电子表格 旁边有三个视图选项,特定于透视图。
从左到右,选项如下:
翻转轴, 可以在网格表中切换 X 和 Y 轴。
展开全部,它会展开网格中的每一行,显示与之相关的更详细信息。
下载,当点击时,会立即将数据透视表作为电子表格下载。
文章
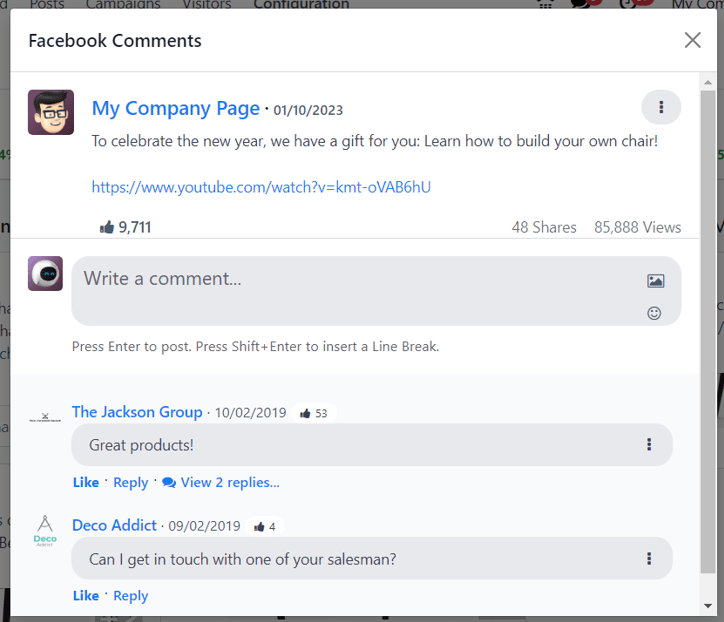
Clicking on a post from a social media stream reveals a pop-up window, showcasing the content of that specific post, along with all the engagement data related to it (e.g. likes, comments, etc.).
If desired, the user can leave a new comment of the post from the post’s pop-up window, by typing one in the Write a comment… field, and clicking Enter to post that comment.
Create leads from comments
Odoo Social Marketing also provides the ability to create leads directly from social media comments.
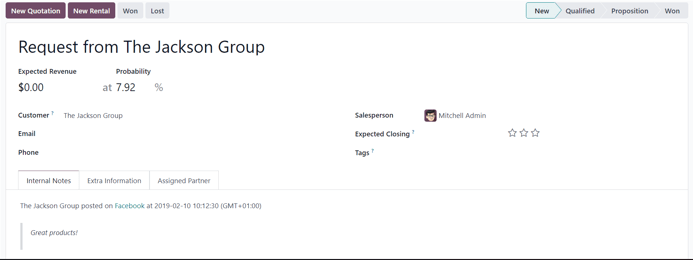
To create a lead from a comment left on a social media post, click on the desired post from the dashboard to reveal that post’s specific pop-up window. Then, scroll to the desired comment, and click the three vertical dots icon to the right of that comment.
Doing so reveals a drop-down menu with the option: Create Lead.
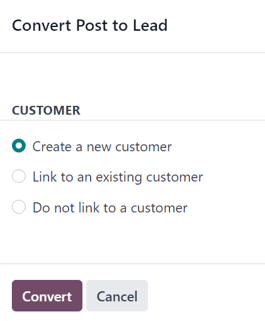
Upon clicking Create Lead from the comment’s drop-down menu, a Conver Post to Lead pop-up window appears.
In this pop-up window, select to either: Create a new customer, Link to an existing customer, or Do not link to a customer.
注解
If Link to an existing customer is selected, a new Customer field appears beneath those options, wherein a customer can be chosen to be linked to this lead.
Once the desired selection has been made, click the Convert button at the bottom of the Convert Post to Lead pop-up window. Doing so reveals a fresh lead detail form, where the necessary information can be entered and processed.
见解
When a social media account stream is added to the Social Marketing dashboard, each stream also displays and links that specific social media platform’s KPIs (if the platform has them).
To get redirected to the statistics and metrics related to any social media account’s KPIs, click on the Insights link, located at the top of each stream.
注解
In a multi-company environment, if not all pages are selected, de-authentication happens.
For example, if the companies have 3 Facebook pages, but only grant access to 1, and try to grant access to another at a later date, they will be de-authenticated, and access to the initial page’s insights/analytics will be lost.
So, be sure to add all pages for all companies in a multi-company environment to avoid this issue. If a page gets de-autenticated, simply remove the stream, and re-establish it.
Post detail form
The social media post detail form in Odoo Social Marketing has many different configurable options available.
公司
If working in a multi-company environment, the first field in the Your Post section of the social media post detail form is Company. In this field, select the company that should be connected to this specific social media post.
发布于
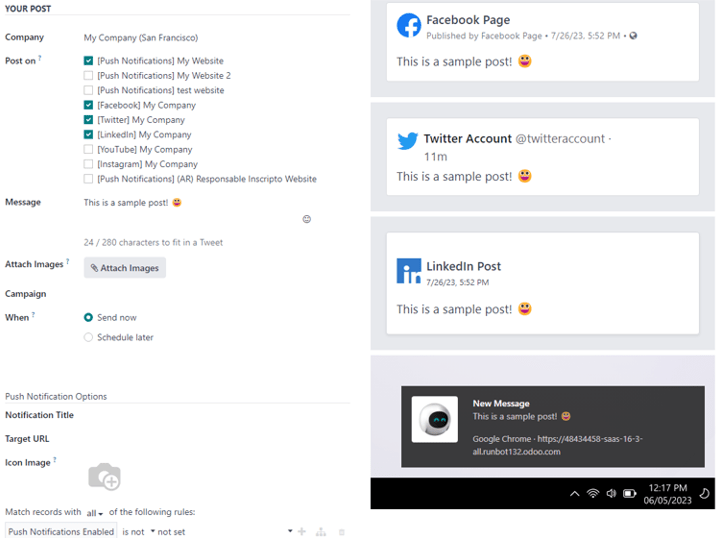
If working in a single-company environment, the first field in the Your Post section of the social media post detail form is Post on. In this field, determine which social media outlets (streams) this post is intended to be posted on, and/or which website’s visitors this post should be sent to, via push notification, by checking the box beside the desired option(s).
Odoo automatically provides every available social media account that’s been linked to the database as an option in this section. If a social media account hasn’t been added as a stream to the Social Marketing application, it will not appear as an option on the post template.
Multiple social media outlets (streams) and websites can be selected in the Post on field. At least one option in the Post on field must be selected.
重要
In order for the Push Notification option to appear on the social media post detail form in Odoo Social Marketing, make sure the Enable Web Push Notifications feature is enabled in the Website app.
To do that, navigate to Enable Web Push Notifications, fill out the corresponding fields, and click Save.
, activate消息
接下来,有 Message 字段。这是创建帖子的主要内容的地方。
在此字段中输入所需的帖子消息。在右侧,当填充了 Message 字段时,Odoo会显示出帖子在上面的 Post on 字段中选择的所有先前选择的社交媒体账户上的外观样本。
小技巧
表情符号也可以直接添加到 消息 字段中。只需点击位于 消息 字段最右边的 表情符号(笑脸)图标。点击此图标会显示一个下拉菜单,其中包含许多可供选择的表情符号。
注解
If Twitter is chosen in the Post on field, a character counter appears beneath the Message field.
附加图片
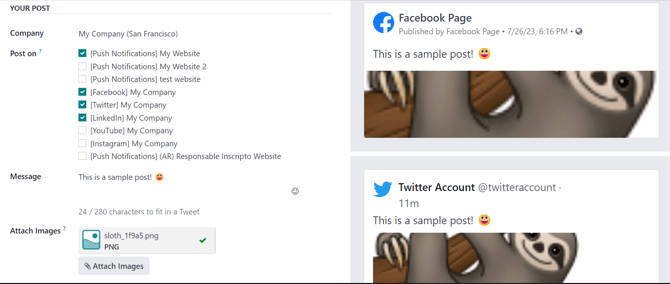
If images are to be used in the post, click the Attach Images button, in the Attach Images field, located beneath the Message field. When clicked, Odoo reveals a pop-up window. In this pop-up window, select the desired image from the hard drive, and upload it.
After successfully uploading and attaching the desired image, Odoo reveals a new preview of the social media post, complete with the newly-added image, on the right side of the detail form.
活动
接下来,有 Message 字段。这是创建帖子的主要内容的地方。
To add this post to a pre-existing campaign, click the empty Campaign field to reveal a drop-down menu, containing all the existing campaigns in the database. Select the desired campaign from this drop-down menu to add this post to that campaign.
要从此 Mailing Campaign 字段创建一个新的活动,请开始键入此新活动的名称,并选择 Create [Campaign Name] 或 Create and Edit…。
点击 创建 会显示一个空白的电子邮件详细表单。
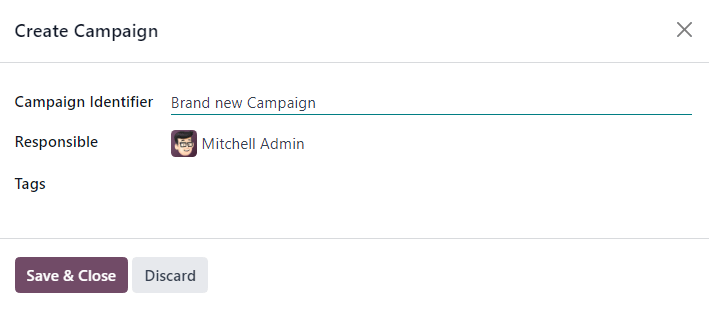
Clicking Create and edit… creates the campaign, and reveals a Create Campaign pop-up form, wherein the Campaign Identifier, Responsible, and Tags can be instantly configured.
When all the desired settings have been entered, click Save & Close to save the campaign and return to the social media post detail form.
何时
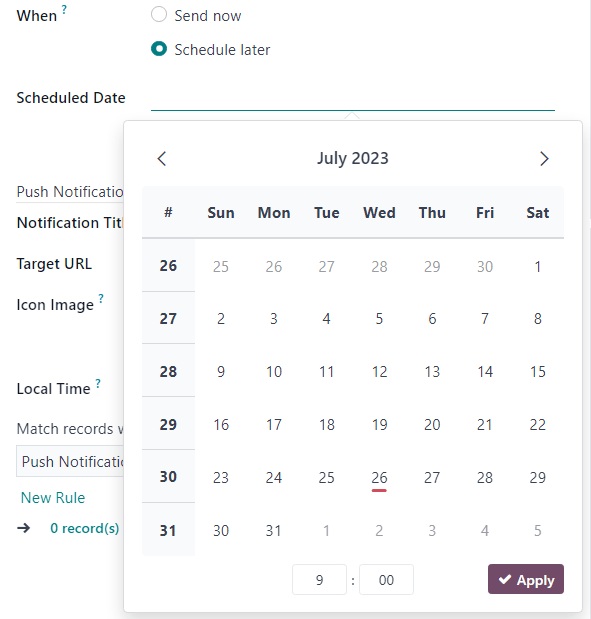
然后,在 When 字段中,选择 Send Now 以立即发布帖子,或选择 Schedule later 以在以后的日期和时间发布帖子。
如果选择了 稍后安排 ,Odoo 会在其下方显示一个新字段( 计划发布日期 字段)。点击该空字段会弹出一个日历,您可以在其中选择未来的日期和时间。到达指定时间时,Odoo 将会立即在预定的社交媒体账户上发布该帖子。
After selecting a desired date and time, click Apply. Then, Odoo will promptly publish the post at that specific date and time on the pre-detemined social media account(s).
注解
If scheduling a post, the Post button at the top of the social media post detail form changes to Schedule. Be sure to click Schedule after completing the social media post detail form.
Doing so, locks in that specific date/time for Odoo to send the post, and it changes the status of the post to Scheduled.
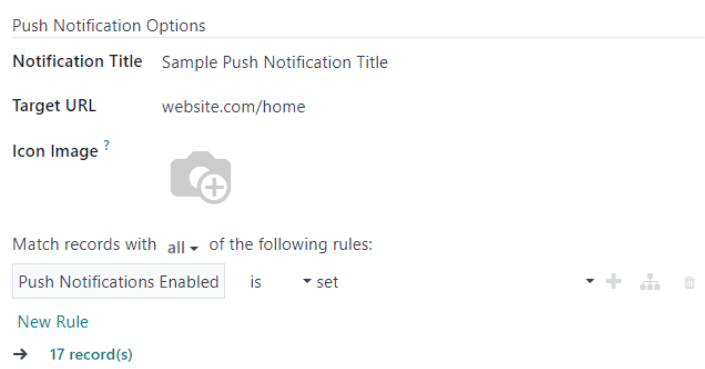
推送通知选项
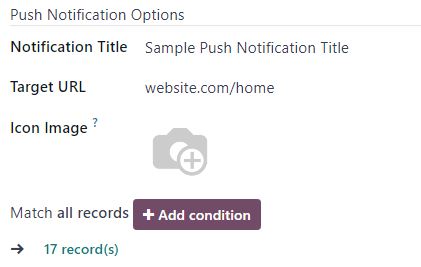
If one (or multiple) [Push Notification] options are chosen in the Post on field, a specific Push Notification Options section appears at the bottom of the social media post detail form.
It should be noted that none of these fields are required.
第一个字段是用于 推送通知标题。这是在发送推送通知时显示的标题文本。如果创建了一个,Odoo会显示此标题的视觉预览。
要指定一个特定的网页作为触发此推送通知的页面,请在 推送目标URL 字段中输入该页面的URL。然后,一旦访问者到达该特定页面,Odoo将显示推送通知。
在该字段下方是添加自定义 推送图标图片 的选项。这是出现在推送通知旁边的图标。默认情况下,Odoo 使用一个”笑脸”作为图标。
To upload a new image, click the ✏️ (pencil) icon when hovering over the Icon Image camera icon. Doing so reveals a pop-up window, in which the desired icon image can be located on the hard drive, and subsequently uploaded.
Once that’s complete, Odoo automatically updates the visual preview of how the icon appears on the push notification.
注解
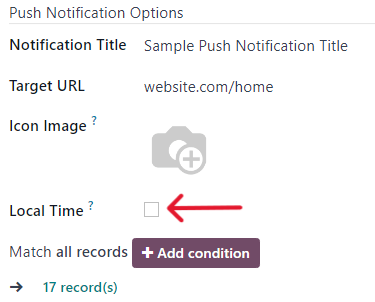
接下来,有一个选项: 按访客时区发送 。如果启用,Odoo将在适当的预定时间发送邮件,考虑到访客的位置。
Then, there is the Match all records field. This field provides the ability to target a specific group of recipients in the database, based on certain criteria, and can be applied to match all or any of the rules.
To utilize this field, click the + Add condition button, which reveals an equation-like rule field.
In this equation-like rule field, specifiy the specific criteria Odoo should take into account when sending this post to a particular target audience.
然后,通过点击方程式右侧的 ➕ (加号) 图标,将另一个节点添加到此过滤器中。
To add a branch (series of additional rules based on the previous rule, to further specify a target audience), click the unique branch icon, located to the right of the ➕ (plus sign) icon.
Lastly, click the 🗑️ (trash can) icon to delete any rule.
The size of the specified target audience of recipients is represented by the number of Records displayed beneath the rules.
另请参阅
Social posts
The Odoo Social Marketing application provides various ways to create posts for any type of social media outlet.