SMS analysis
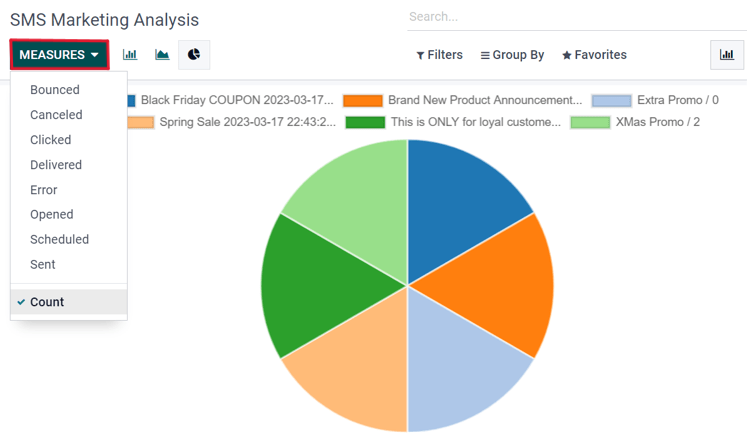
在 Reporting 页面上(通过头部菜单中的 选项访问),有多种选项可以应用不同组合的 Filters 和 Measures 以查看多种不同布局的指标(例如 Graph 、 List 和 Cohort 视图)。
每个 Reporting 指标视图选项都可以进行更广泛的性能分析 SMS 邮件发送。
例如,在默认的 Graph 视图中, SMS 数据以不同的图表形式呈现,可以按照不同的方式进行排序和分组(例如, Measures 下拉菜单)。
小技巧
SMS messages can be sent using automation rules in Odoo. Odoo Studio is required to use automation rules.
To install Odoo Studio, go to the Search… bar, search for studio
.
If it is not already installed, click Install.
Adding the Studio application upgrades the subscription status to Custom, which increases the cost. Consult support, or reach out to the database’s customer success manager, with any questions on making the change.
To use automation rules, navigate in developer mode, to . Then, click New to create a new rule.
Enter a name for the automation rule, and select a Model to implement this rule on.
Based on the selection for the Trigger, additional fields will populate below. Set the Trigger to one of the following options:
Values Updated
User is set
State is set to
On archived
On unarchived
Timing Conditions
Based on date field
After creation
After last update
Custom
On save
On deletion
On UI change
External
On webhook
Other options may appear based on the Model selected. For example if the Calendar Event model is selected, then the following options appear in addition to those above:
Email Events
On incoming message
On outgoing message
Under the Before Update Domain field, set a condition to be met before updating the record. Click Edit Domain to set record parameters.
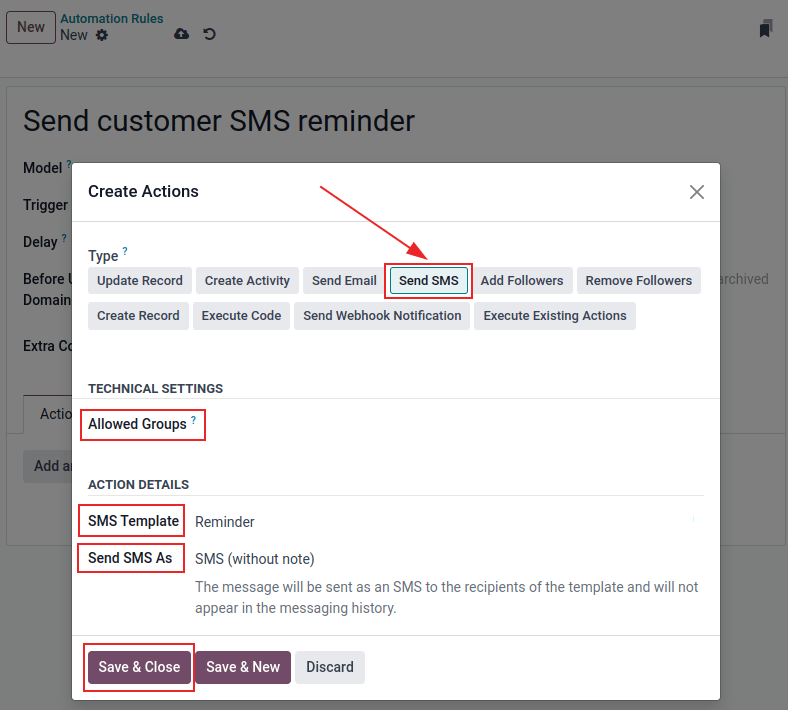
Under the Actions To Do tab, select Add an action. Next, in the resulting Create Actions pop-up window, select Send SMS, and set the Allowed Groups. Allowed Groups are the access rights groups that are allowed to execute this rule. Leave the field empty to allow all groups. See this documentation: Create and modify groups.
Next, set the SMS Template and choose whether the SMS message should be logged as a note, by making a selection in the drop-down menu: Send SMS as. Click Save and Close to save the changes to this new action.
Add any necessary notes under the Notes tab. Finally, navigate away from the completed automation rule, or manually save (by clicking the ☁️ (cloud) icon), to implement the change.