门户访问
门户网站访问权限是为那些需要在Odoo数据库中查看特定文档或信息的用户提供的。
提供门户访问的一些常见用例包括允许客户在Odoo中阅读/查看以下任何或所有内容:
潜在客户/商机
报价/销售订单
采购订单
发票和账单
项目
任务
时间表
工单
签名
订阅
注解
门户用户仅具有读取/查看权限,无法编辑数据库中的任何文档。
为客户提供门户访问权限
从主要的Odoo仪表板中,选择 联系人 应用程序。如果联系人尚未在数据库中创建,请点击 创建 按钮,输入联系人的详细信息,然后点击 保存。否则,选择一个现有的联系人,然后点击位于界面顶部中心的 操作 下拉菜单。
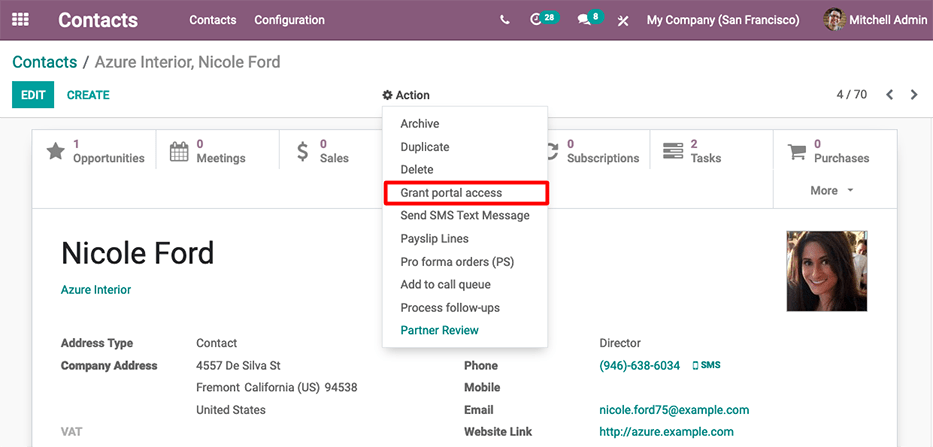
然后选择 授予门户访问权限。弹出一个窗口,列出三个字段:
联系人: 在Odoo数据库中记录的联系人姓名
Email: 用户的电子邮件地址,他们将用此地址登录门户
在门户中: 用户是否具有门户访问权限
要授予门户访问权限,首先输入联系人的 Email,他们将用此邮箱登录门户。然后,在 In Portal 列下勾选框。可选择性地,添加联系人将收到的邀请消息的文本。然后点击 Apply 完成。
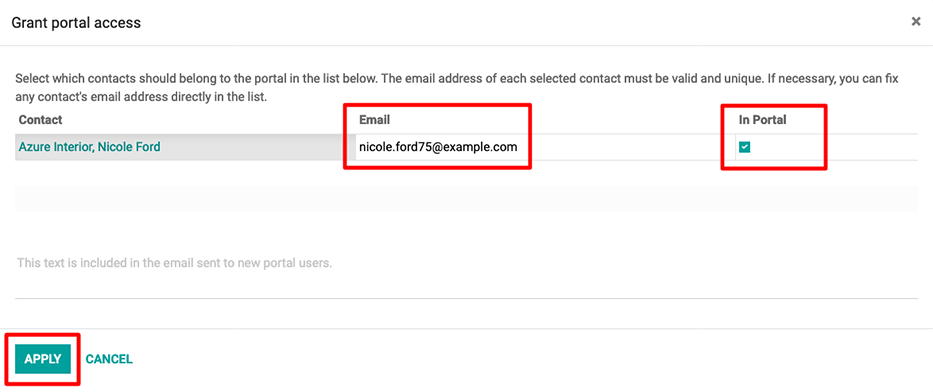
将会向指定的电子邮件地址发送一封邮件,说明该联系人现在是该Odoo数据库的门户用户。
小技巧
要一次授予多个用户门户访问权限,请导航到公司联系人,然后单击 以查看公司所有相关联系人的列表。选中所有需要门户访问权限的联系人下方的复选框,然后单击 应用。
注解
在任何时候,可以通过导航到联系人,点击 ,然后取消选择 门户 列下的复选框,最后点击 应用,来撤销门户访问权限。
Change portal username
There may be times when a portal user wants to change their user login. This can be done by any user in the database with administrator access rights. The following process outlines the necessary steps to change the portal user login.
First, navigate to . Then, under Filters, select
Portal Users, or select Add Custom Filter and set the following
configuration Groups > contains > portal. After making this selection,
search for (and open) the portal user that needs to be edited.
Next, click Edit (if necessary), click into the Email Address field, and proceed to make any necessary changes to this field. The Email Address field is used to log into the Odoo portal.
注解
Changing the Email Address (or login) only changes the username on the customer’s portal login.
In order to change the contact email, this change needs to take place on the contact template in the Contacts app. Alternatively, the customer can change their email directly from the portal, but the login cannot be changed. See change customer info.
Customer portal changes
There may be times when the customer would like to make changes to their contact information, password/security, or payment information attached to the portal account. This can be performed by the customer from their portal. The following process is how a customer can change their contact information.
Change customer info
First enter the username and password (login) into the database login page to access the portal user account. A portal dashboard will appear upon successfully logging in. Portal documents from the various installed Odoo applications will appear with the number count of each.
Next, navigate to the upper-right corner of the portal, and click the Edit button, next to the Details section. Then, change the pertinent information, and click Confirm.
Change password
First enter the username and password (login) into the database login page to access the portal user account. A portal dashboard will appear upon successfully logging in.
If the customer would like to change their password for portal access, click on the Edit Security Settings link, below the Account Security section. Then, make the necessary changes, by typing in the current Password, New Password, and verify the new password. Lastly, click on Change Password to complete the password change.
注解
If a customer would like to change the login, as documented above, contact the Odoo database point-of-contact. See above documentation on changing the portal username.
注解
Passwords for portal users and Odoo.com users remain separate, even if the same email address is used.
Add two-factor authentication
First enter the username and password (login) into the database login page to access the portal user account. A portal dashboard will appear upon successfully logging in.
If the customer would like to turn on two-factor authentication (2FA) for portal access, click on the Edit Security Settings link, below the Account Security section.
Click on Enable two-factor authentication to turn on 2FA. Confirm the current portal password in the Password field. Then, click on Confirm Password. Next, activate 2FA in a 2FA app (Google Authenticator, Authy, etc.), by scanning the QR code or entering a Verification Code.
Finally, click Enable two-factor authentication to complete the setup.
Change payment info
First enter the username and password (login) into the database login page to access the portal user account. A portal dashboard will appear upon successfully logging in.
If the customer would like to manage payment options, navigate to the Manage payment methods in the menu on the right. Then, add the new payment information, and select Add new card.