使用Azure OAuth将Microsoft Outlook 365连接到Odoo
Odoo 兼容 Microsoft 的 Azure OAuth 用于 Microsoft 365。为了从自定义域发送和接收安全电子邮件,只需要在 Azure 平台和 Odoo 数据库的后端配置一些设置。此配置适用于个人电子邮件地址或自定义域创建的地址。
Setup in Microsoft Azure Portal
创建新应用程序
To get started, go to Microsoft’s Azure Portal. Log in with the Microsoft Outlook Office 365 account if there is one, otherwise log in with the personal Microsoft account. A user with administrative access to the Azure Settings will need to connect and perform the following configuration. Next, navigate to the section labeled Manage Microsoft Entra ID (formally Azure Active Directory).
Now, click on Add (+), located in the top menu, and then select App
registration. On the Register an application screen, rename the Name to
Odoo or something recognizable. Under the Supported account types section select
Accounts in any organizational directory (Any Microsoft Entra ID directory - Multitenant)
and personal Microsoft accounts (e.g. Skype, Xbox).
Under the Redirect URL section, select Web as the platform, and then input
https://<odoo base url>/microsoft_outlook/confirm in the URL field. The Odoo base URL
is the canonical domain at which your Odoo instance can be reached in the URL field.
Example
mydatabase.odoo.com,其中 mydatabase 是数据库子域名的实际前缀,假设它托管在 Odoo.com 上
After the URL has been added to the field, Register the application so it is created.
API 权限
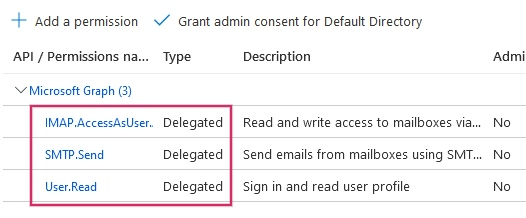
下一步应设置 API 权限。Odoo 需要特定的 API 权限才能在 Microsoft 365 设置中读取(IMAP)和发送(SMTP)电子邮件。首先,点击左侧菜单栏中的 API 权限 链接。接下来,点击 (+) 添加权限 按钮,并在 常用 Microsoft API 下选择 Microsoft Graph。然后,选择 委派权限 选项。
In the search bar, search for the following Delegated permissions and click Add permissions for each one:
SMTP.Send
IMAP.AccessAsUser.All
注解
默认情况下将添加 User.Read 权限。
分配用户和组
After adding the API permissions, navigate back to the Overview of the Application in the top of the left sidebar menu.
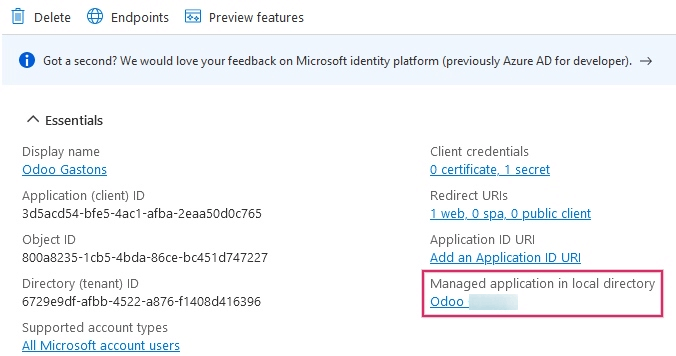
现在,将用户添加到此应用程序。在 Essentials 概览表下,点击标记为 Managed Application in Local Directory 的链接,或者点击表格右下角的最后一个选项。
在左侧边栏菜单中,选择 用户和组。接下来,点击 (+) 添加用户/组。根据账户的不同,可以添加 组 和 用户,或者只能添加 用户。个人账户只允许添加 用户。
在 用户 或 组 下,点击 无选择 并添加将从 Odoo 中的 Microsoft 账户 发送电子邮件的用户或用户组。 添加 用户/组,点击 选择,然后 分配 给应用程序。
创建凭据
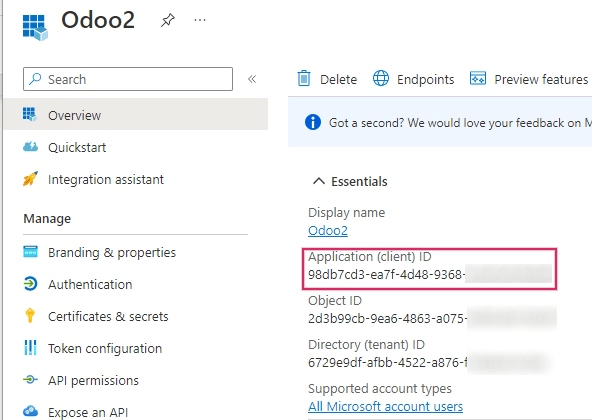
现在,微软Azure应用已经设置好,需要为Odoo设置创建凭据。这些凭据包括: Client ID 和 Client Secret 。首先,可以从应用的 Overview 页面复制 Client ID 。 Client ID 或 Application ID 位于应用的 Essentials 概述中的 Display Name 下方。
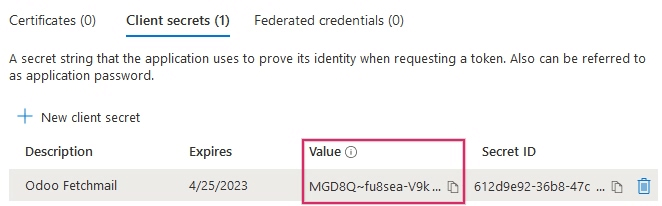
接下来,需要获取 Client Secret Value。要获取此值,请单击左侧边栏菜单中的 Certificates & Secrets。然后,需要生成一个 Client Secret。为此,请单击 (+) New Client Secret 按钮。
右侧将弹出一个窗口,上面有一个标有 Add a client secret 的按钮。在 Description 下面,输入 Odoo Fetchmail 或者其他可识别的内容,然后设置 expiration date。
重要
如果第一个过期,需要生成和配置一个新的 Client Secret。在这种情况下,可能会出现服务中断,因此应该记录下过期日期并设置为最远的可能日期。
接下来,当这两个值输入后,点击 Add 。将会创建一个 Client Secret Value 和 Secret ID 。重要的是将 Value 或 Client Secret Value 复制到记事本中,因为离开此页面后它将被加密。 Secret ID 不需要。
完成这些步骤后,以下项目应准备好在Odoo中设置:
客户端 ID(客户端 ID 或 应用程序 ID)
客户端密钥(Value 或 Client Secret Value)
This completes the setup on the Microsoft Azure Portal side.
在Odoo中设置
Enter Microsoft Outlook credentials
首先,打开Odoo数据库并导航到 Apps 模块。然后,从搜索栏中移除 Apps 过滤器,并输入 Outlook。之后,安装名为 Microsoft Outlook 的模块。
接下来,导航到 ,在 讨论 部分下,确保 自定义电子邮件服务器 复选框已选中。这将填充一个新选项: Outlook 凭据 。
Save the progress.
然后,将 Client ID (Application ID) 和 Client Secret (Client Secret Value) 复制并粘贴到相应的字段中,然后 Save 设置。

Configure outgoing email server
在 常规设置 页面下,找到 自定义电子邮件服务器 设置,点击 发送电子邮件服务器 链接来配置 Microsoft 账户。
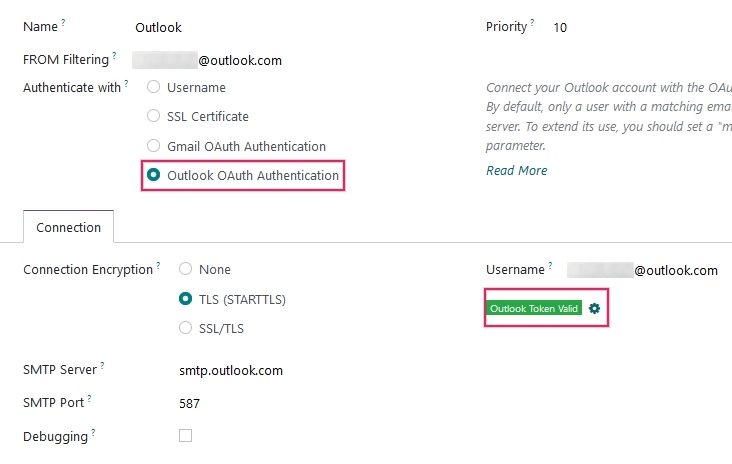
然后,创建一个新的电子邮件服务器并勾选 Outlook。接下来,填写 Name`(可以是任何内容)和 Microsoft Outlook 电子邮件 :guilabel:`Username。
如果 From Filter 字段为空,请输入 domain or email address。
然后,点击 连接您的Outlook帐户。
打开一个新的窗口来完成 授权过程。选择在 Odoo 中正在配置的适当的电子邮件地址。
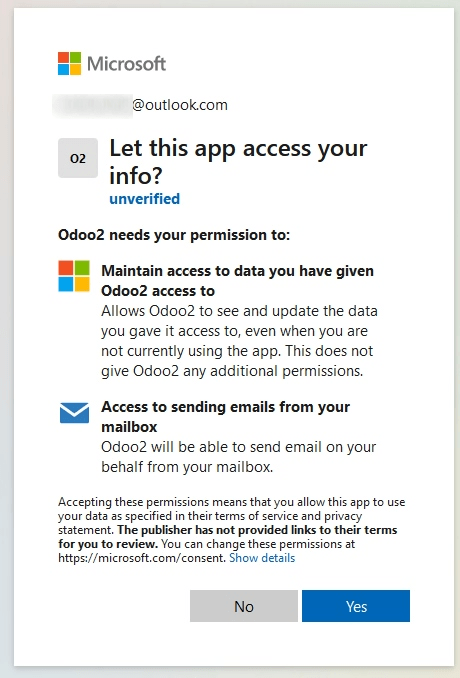
然后,点击 Yes 允许 Odoo 访问 Microsoft 账户。之后,页面将导航回 Odoo 中新配置的 Outgoing Mail Server。配置会自动加载 Odoo 中的 token,并且一个标签 Outlook Token Valid 会以绿色显示。
最后,点击 测试连接。应该会出现一个确认消息。Odoo 数据库现在可以通过 OAuth 认证向 Microsoft Outlook 发送安全的电子邮件。
Configuration with a single outgoing mail server
Configuring a single outgoing server is the simplest configuration available for Microsoft Azure and it doesn’t require extensive access rights for the users in the database.
A generic email address would be used to send emails for all users within the database. For example
it could be structured with a notifications alias (notifications@example.com) or contact alias
(contact@example.com). This address must be set as the FROM Filtering on the server.
This address must also match the {mail.default.from}@{mail.catchall.domain} key combination in the
system parameters.
另请参阅
For more information on the from filter visit: 使用默认的”发件人”电子邮件地址.
注解
The System Parameters can be accessed by activating 开发者模式(调试模式) in the menu.
When using this configuration, every email that is sent from the database will use the address of
the configured notification mailbox. However it should be noted that the name of the sender will
appear but their email address will change:

Example
Single outgoing mail server configuration:
Outgoing mail server username (login) =
notifications@example.comOutgoing mail server FROM Filtering =
notifications@example.commail.catchall.domainin system parameters =example.commail.default.fromin system parameters =notifications
User-specific (multiple user) configuration
In addition to a generic email server, individual email servers can be set up for users in a database. These email addresses must be set as the FROM Filtering on each individual server for this configuration to work.
This configuration is the more difficult of the two Microsoft Azure configurations, in that it requires all users configured with email servers to have access rights to settings in order to establish a connection to the email server.
设置
Each user should have a separate email server set up. The FROM Filtering should be set so that only the user’s email is sent from that server. In other words, only a user with an email address that matches the set FROM Filtering is able to use this server.
另请参阅
For more information on the from filter visit: 使用默认的”发件人”电子邮件地址.
A fallback server must be setup to allow for the sending of
notifications. The FROM Filtering for this server should have the value of
the {mail.default.from}@{mail.catchall.domain}.
注解
The System Parameters can be accessed by activating 开发者模式(调试模式) in the menu.
重要
The configuration for this transactional email server can work alongside an outgoing mass-mailing email server. The FROM Filtering for the mass-mailing email server can remain empty, but it’s require to be added in the settings of the Email Marketing application.
另请参阅
For more information on setting the mass-mailing email server visit 为交易和群发邮件设置不同的专用服务器.
Example
Multiple user outgoing mail server configuration:
- User #1 mailbox
Outgoing mail server #1 username (login) =
john@example.comOutgoing mail server #1 FROM Filtering =
john@example.com
- User #2 mailbox
Outgoing mail server #2 username (login) =
jane@example.comOutgoing mail server #2 FROM Filtering =
jane@example.com
- Notifications mailbox
Outgoing mail server #3 username (login) =
notifications@example.comOutgoing mail server #3 FROM Filtering =
notifications@example.com
- System Parameters
mail.catchall.domainin system parameters =example.commail.default.fromin system parameters =notifications
Configure incoming email server
The incoming account should be configured in a similar way to the outgoing email account. Navigate to the Incoming Mail Servers in the Technical Menu and Create a new configuration. Check or Select the button next to Outlook Oauth Authentication and enter the Microsoft Outlook username. Click on Connect your Outlook account. Odoo will state: Outlook Token Valid Now Test and Confirm the account. The account should be ready to receive email to the Odoo database.